Cannondale Adventure Neo Allroad Speed Common Problems and Troubleshooting
Unlock the full potential of your Cannondale Adventure Neo Allroad Speed with ease! Our comprehensive guide is your go-to resource for addressing the most common problems encountered with this high-performance e-bike. From technical glitches to minor hiccups, we’ve got you covered.
Say goodbye to roadblocks and enjoy seamless cycling as we provide expert troubleshooting solutions, ensuring your Cannondale Adventure Neo Allroad Speed is always ready for your next adventure. Explore this troubleshooting guide to ride confidently and keep your e-bike in prime condition, letting you experience the thrill of the open road to its fullest.
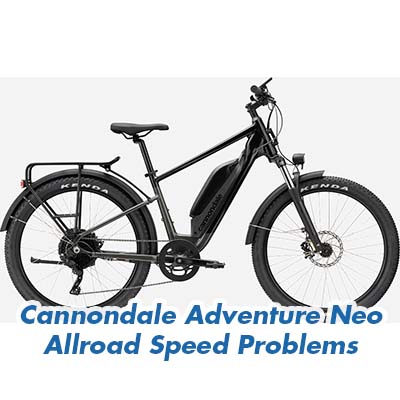
Cannondale Adventure Neo Allroad Speed Overview
Go Electric. Go Anywhere. The S is Adventure Neo Allroad unleashed. It’s a rugged Class 3 electric bike with a powerful electric motor, giving you huge range and boosting your speed up to 28mph. The Cannondale Adventure Neo Allroad Speed is built for speed, comfort, and efficiency. It features a durable, lightweight aluminum frame with a front suspension fork, a powerful 750W hub motor providing electric assist up to 28 MPH, and up to a 71-mile range on a single charge. This e-bike comes stocked with rear racks, fenders, lights, a kickstand, and an LCD display with a USB port to charge your phone.
| Platform | Adventure Neo Allroad |
|---|---|
| Model Name | Adventure Neo Allroad Speed |
| Model Code | C68303M |
Product Details and Features
- Durable, lightweight aluminum frame with front suspension fork
- Powerful 750W hub motor provides electric assist up to 28 MPH
- Up to 71-mile range on a single charge
- Stocked with rear racks, fenders, lights, kickstand, & LCD display with USB port to charge your phone
Causes of Common Problems with the Cannondale Adventure Neo Allroad Speed
Before diving into the specific problems and troubleshooting solutions, let’s explore some common issues that riders may encounter with the Cannondale Adventure Neo Allroad Speed electric bike.
Common Problems with Cannondale Adventure Neo Allroad Speed
1. Battery Not Charging Properly
Description: One common issue with the Cannondale Adventure Neo Allroad Speed is the battery not charging as expected. Riders may find that the battery doesn’t hold a charge or fails to charge completely.
Cause: This problem can occur due to a variety of reasons, including a faulty charger, a damaged battery, or improper charging procedures.
Troubleshooting: To address this issue, follow these steps:
- Check the charger and ensure it is functioning correctly.
- Inspect the battery connections for any loose wires or damage.
- Charge the battery according to the manufacturer’s recommended guidelines.
- If the problem persists, contact the manufacturer or a certified service center for battery replacement or further assistance.
2. Motor Assistance Intermittent
Description: Some riders may experience intermittent motor assistance while using the Cannondale Adventure Neo Allroad Speed. The electric motor may cut in and out unexpectedly.
Cause: This issue can be caused by loose electrical connections, sensor malfunctions, or software glitches.
Troubleshooting: To resolve intermittent motor assistance problems, follow these steps:
- Check all electrical connections for tightness and secure any loose wires.
- Clean and inspect the motor sensors for dirt or damage.
- Update the bike’s firmware if applicable, as new software versions may address motor control issues.
- If the problem persists, contact a professional bike mechanic or the manufacturer for further diagnosis and repair.
3. Brake Issues
Description: Brake problems, such as squeaking, poor stopping power, or uneven braking, can occur on the Cannondale Adventure Neo Allroad Speed.
Cause: Common causes of brake issues include worn brake pads, contaminated brake discs, or misaligned brake calipers.
Troubleshooting: To address brake problems, follow these steps:
- Inspect the brake pads for wear and replace them if they are worn down.
- Clean the brake discs with a suitable cleaner to remove any contaminants.
- Ensure that the brake calipers are aligned properly and adjust if necessary.
- If issues persist, consider upgrading brake components or consult a bike mechanic for further assistance.
4. Display Malfunctions
Description: Riders may encounter problems with the bike’s LCD display, such as screen freezing, inaccurate readings, or display not turning on.
Cause: Display malfunctions can result from software glitches, loose connections, or display unit defects.
Troubleshooting: To resolve display issues, follow these steps:
- Restart the bike and reset the display by turning it off and on again.
- Check and secure any loose cables or connections leading to the display unit.
- If the problem persists, contact the manufacturer’s customer support or a certified technician for display unit replacement or repair.
5. Chain Skipping Gears
Description: Some riders may experience the chain skipping gears while shifting, leading to an inconsistent and uncomfortable riding experience.
Cause: Chain skipping can be caused by a misadjusted derailleur, worn chain, or damaged cassette.
Troubleshooting: To address chain skipping issues, follow these steps:
- Inspect the chain for signs of wear, such as stretched links, and replace it if necessary.
- Adjust the derailleur according to the manufacturer’s specifications to ensure precise shifting.
- If the issue persists, examine the cassette for wear and replace it if worn-out teeth are detected.
- Seek assistance from a bike mechanic if the problem continues after these adjustments.
6. Uneven Tire Wear
Description: Riders may notice uneven wear on the bike’s tires, with certain areas of the tread showing more wear and tear than others.
Cause: Uneven tire wear can be attributed to improper tire pressure, misaligned wheels, or road conditions.
Troubleshooting: To address uneven tire wear, follow these steps:
- Regularly check and maintain proper tire pressure as per the manufacturer’s recommendations.
- Inspect the wheel alignment and ensure that both wheels are aligned correctly.
- Adjust your riding style to avoid rough terrain that may contribute to uneven tire wear.
- If the issue persists, consult with a bike mechanic for a thorough evaluation of the bike’s alignment and tire condition.
7. Loud Chain Noise
Description: Some riders may experience loud, bothersome noises coming from the bike’s chain during pedaling.
Cause: The cause of noisy chains can range from a lack of lubrication to chain misalignment or a damaged chainring.
Troubleshooting: To address loud chain noise, follow these steps:
- Apply a suitable chain lubricant to ensure proper chain lubrication.
- Inspect the chain for any visible damage or misalignment and adjust as needed.
- Check the condition of the chainring for wear or damage and replace if necessary.
- If noise persists, consider consulting a bike mechanic for a professional assessment and potential replacement of components.
8. Inconsistent Pedal Assist Levels
Description: Riders may encounter issues with inconsistent levels of pedal assistance, making it difficult to maintain a desired riding speed.
Cause: This problem can result from sensor malfunctions, wiring issues, or controller software glitches.
Troubleshooting: To resolve inconsistent pedal assist levels, follow these steps:
- Inspect and clean the pedal-assist sensors to ensure they are functioning correctly.
- Check all wiring connections related to the pedal-assist system for loose or damaged wires.
- If applicable, update the controller firmware to the latest version provided by the manufacturer.
- If the issue persists, contact the manufacturer’s customer support or a certified technician for further diagnosis and repair.
9. Unresponsive LCD Display
Description: Riders may encounter situations where the LCD display becomes unresponsive, making it difficult to access vital information during the ride.
Cause: Unresponsive displays can be caused by software issues, loose connections, or a defective display unit.
Troubleshooting: To address an unresponsive LCD display, follow these steps:
- Attempt to restart the display by turning it off and on again.
- Check and secure any loose cables or connections leading to the display unit.
- If the problem persists, consider updating the bike’s firmware or consult a professional for display unit replacement or repair.
10. Rapid Battery Drain
Description: Some riders may experience a rapid depletion of the battery, resulting in shorter than expected riding distances.
Cause: Rapid battery drain can be caused by factors such as riding in high-assist modes continuously, cold weather conditions, or a failing battery.
Troubleshooting: To address rapid battery drain, follow these steps:
- Consider reducing the use of high-assist modes and ride in lower assist levels to conserve battery power.
- Charge the battery in a warm indoor environment during cold weather to improve its performance.
- If the problem persists and the battery is within warranty, contact the manufacturer for a potential battery replacement.
11. Loose Handlebars
Description: Riders may encounter issues with loose handlebars, which can affect steering control and safety during rides.
Cause: Loose handlebars can result from improper assembly, loose stem bolts, or handlebar clamp issues.
Troubleshooting: To address loose handlebars, follow these steps:
- Inspect the stem bolts and ensure they are tightened to the manufacturer’s recommended torque.
- Check the handlebar clamp for any damage or irregularities and replace if necessary.
- If the problem persists, consult a bike mechanic for professional assistance in reassembling and securing the handlebars.
12. Sudden Braking Jolts
Description: Some riders may experience sudden and jolting stops when applying the brakes, leading to discomfort and instability.
Cause: Sudden braking jolts can be caused by overly sensitive brake settings, misadjusted brake levers, or brake component issues.
Troubleshooting: To resolve sudden braking jolts, follow these steps:
- Adjust the brake lever tension to reduce sensitivity and provide a smoother braking experience.
- Inspect the brake pads for any contaminants or irregular wear and clean or replace them as needed.
- Ensure that the brake calipers are properly aligned and adjust them if necessary.
- If issues persist, consider upgrading brake components or consult a bike mechanic for further assessment.
13. Noisy Suspension Fork
Description: Riders may notice unusual noises coming from the bike’s suspension fork when riding over uneven terrain.
Cause: Noisy suspension forks can result from dry or worn-out bushings, loose components, or insufficient lubrication.
Troubleshooting: To address a noisy suspension fork, follow these steps:
- Apply lubrication to the suspension fork bushings and pivot points to reduce friction and noise.
- Inspect all suspension fork components for tightness and secure any loose parts.
- If noise continues, consider having the suspension fork serviced or rebuilt by a professional bike mechanic.
14. Electrical Connection Issues
Description: Some riders may experience intermittent electrical connection problems, leading to sporadic power loss or sensor errors.
Cause: Electrical connection issues can arise from loose or damaged wires, connectors, or sensor malfunctions.
Troubleshooting: To resolve electrical connection issues, follow these steps:
- Inspect all electrical connections and ensure they are securely connected and free from damage.
- Clean and secure the connectors to the various electrical components of the bike.
- If problems persist, consult a certified technician or the manufacturer for a thorough diagnosis and repair.
15. Unusual Noise from Hub Motor
Description: Riders may notice unusual sounds emanating from the hub motor, such as grinding or clicking noises, which can affect ride quality.
Cause: Unusual hub motor noises can result from foreign objects lodged in the motor, damaged internal components, or wear and tear.
Troubleshooting: To address unusual hub motor noises, follow these steps:
- Inspect the hub motor for any foreign objects or debris and remove them if present.
- If the noises persist, consult a bike mechanic or the manufacturer for a thorough evaluation of the hub motor and potential repairs.
16. Loose Pedals
Description: Riders may encounter issues with loose pedals, which can affect pedaling efficiency and rider comfort.
Cause: Loose pedals can result from improper installation or worn-out pedal threads.
Troubleshooting: To address loose pedals, follow these steps:
- Check the pedal threads and ensure they are properly tightened onto the crank arms.
- If pedal threads are worn, consider replacing the pedals with new ones.
- If you’re unsure about installation, consult a bike mechanic to ensure proper pedal attachment.
17. Gear Shifting Problems
Description: Some riders may experience difficulties when shifting gears, including gears not engaging or slipping unexpectedly.
Cause: Gear shifting problems can be caused by cable tension issues, misaligned derailleurs, or worn-out drivetrain components.
Troubleshooting: To resolve gear shifting problems, follow these steps:
- Check cable tension and adjust as needed to ensure smooth and accurate gear shifts.
- Inspect the derailleurs for proper alignment and make necessary adjustments.
- If gears continue to slip or refuse to engage, consider replacing worn-out drivetrain components such as the cassette or chain.
- If you’re unsure about adjustments, consult a bike mechanic for professional assistance.
18. Uncomfortable Saddle
Description: Some riders may find the bike’s saddle uncomfortable, leading to discomfort during longer rides.
Cause: Saddle discomfort can result from personal preferences, improper saddle positioning, or saddle design.
Troubleshooting: To address an uncomfortable saddle, follow these steps:
- Experiment with saddle height and angle to find a more comfortable riding position.
- If the saddle design is the issue, consider replacing it with one that better suits your comfort needs.
- Invest in padded shorts or a gel saddle cover to improve overall riding comfort.
19. Loose Spokes
Description: Riders may notice loose or rattling spokes on the bike’s wheels, which can affect wheel stability and ride quality.
Cause: Loose spokes can occur due to improper wheel tension, wear and tear, or damage from impacts.
Troubleshooting: To address loose spokes, follow these steps:
- Inspect the spokes and tighten them to the recommended tension, evenly distributing the tension across all spokes.
- If spokes are damaged or broken, consider replacing them or having the wheel professionally trued.
- Regularly check and maintain proper spoke tension to prevent future issues.
20. Unpredictable Range
Description: Some riders may experience unpredictable changes in the bike’s range, with the battery depleting faster than expected.
Cause: Unpredictable range can be influenced by factors like terrain, rider weight, and weather conditions.
Troubleshooting: To address unpredictable range, follow these steps:
- Consider riding in lower assist modes and conserving energy when tackling challenging terrain.
- Monitor your riding habits and adjust expectations based on factors such as rider weight and weather conditions.
- If range issues persist and are not explained by external factors, consult the manufacturer for battery health checks or potential replacements.
21. Loose or Noisy Handlebar Stem
Description: Riders may encounter issues with a loose or noisy handlebar stem, affecting steering control and comfort.
Cause: Loose or noisy stems can result from loose bolts, misalignment, or inadequate lubrication.
Troubleshooting: To address a loose or noisy handlebar stem, follow these steps:
- Check and tighten all bolts securing the handlebar stem to the fork steerer tube.
- Ensure the stem and handlebars are properly aligned for a comfortable riding position.
- Lubricate the stem’s contact points with the fork steerer tube to reduce noise and friction.
- If the problem persists, consult a bike mechanic for a thorough evaluation and adjustments.
22. Brake Fluid Leaks
Description: Some riders may notice brake fluid leaks, which can compromise braking performance and safety.
Cause: Brake fluid leaks can occur due to damaged brake lines, seals, or brake calipers.
Troubleshooting: To address brake fluid leaks, follow these steps:
- Inspect the brake lines, seals, and calipers for visible signs of leakage or damage.
- If leaks are detected, do not ride the bike and immediately consult a bike mechanic for brake system evaluation and repair.
- Regularly check the brake fluid levels and maintain them as per the manufacturer’s recommendations to prevent leaks.
23. Frequent Chain Slippage
Description: Riders may experience frequent chain slippage, causing an unreliable pedaling experience.
Cause: Chain slippage can result from worn chainrings, cassette, or chain, as well as incorrect derailleur adjustments.
Troubleshooting: To address frequent chain slippage, follow these steps:
- Inspect the chain for wear and replace it if stretched or damaged.
- Examine the chainrings and cassette for worn-out teeth and replace them if necessary.
- Ensure proper derailleur adjustments for precise shifting and chain engagement.
- If issues persist, consult a bike mechanic for professional assessment and adjustments.
24. Unresponsive Brakes
Description: Some riders may encounter unresponsive brakes, where the brake levers feel spongy or require excessive force to engage.
Cause: Unresponsive brakes can be caused by air in the brake lines, worn brake pads, or contaminated brake fluid.
Troubleshooting: To resolve unresponsive brake issues, follow these steps:
- Bleed the brake lines to remove any trapped air and restore brake responsiveness.
- Inspect the brake pads for wear and replace them if they are worn down.
- Check the brake fluid for contamination and replace it if necessary.
- If the problem persists, consult a bike mechanic for a thorough brake system evaluation and maintenance.
25. Pedal Squeaking
Description: Riders may experience annoying squeaking noises coming from the bike’s pedals during pedaling.
Cause: Pedal squeaking can result from dry pedal bearings, worn pedal components, or insufficient lubrication.
Troubleshooting: To address pedal squeaking, follow these steps:
- Apply lubricant to the pedal bearings to reduce friction and eliminate squeaking noises.
- Inspect the pedal components for wear or damage and replace if necessary.
- Regularly maintain and lubricate the pedals to prevent future squeaking issues.
Cannondale Adventure Neo Allroad Speed Electric Bike User Reviews
When considering a purchase as significant as an electric bike, it’s essential to hear from users who have hands-on experience with the product. We’ve gathered insights from Cannondale Adventure Neo Allroad Speed Electric Bike users available online to provide you with an overview of their feedback.
Positive Reviews from Cannondale Adventure Neo Allroad Speed Electric Bike Users
- Some users were satisfied with the impressive range offered by the Cannondale Adventure Neo Allroad Speed Electric Bike, allowing them to cover long distances without worrying about battery life.
- Several riders praised the comfortable and ergonomic design of the bike, emphasizing the ease of use and adaptability to various terrains.
- Many users appreciated the powerful electric motor, which provided ample assistance and helped them reach higher speeds, especially on flat terrain.
- Positive feedback also highlighted the bike’s durable frame and components, suggesting that it’s built to withstand various riding conditions.
- Several riders commended the inclusion of features such as rear racks, fenders, lights, and a USB port for added convenience during their rides.
Based on the positive reviews, it’s clear that many users have had a favorable experience with the Cannondale Adventure Neo Allroad Speed Electric Bike. They value its range, comfort, performance, durability, and thoughtful features.
Negative User Reviews of the Cannondale Adventure Neo Allroad Speed Electric Bike
- Some users were not satisfied with the bike’s weight, finding it relatively heavy and challenging to handle in certain situations.
- A few riders expressed concerns about the bike’s price, stating that it falls on the higher end of the price spectrum for electric bikes.
- Several users reported minor technical issues, such as intermittent motor assistance or display malfunctions, which affected their overall riding experience.
- There were a few complaints about the bike’s noise levels, with some users mentioning that the motor or other components produced noticeable sounds during operation.
- A handful of riders found the bike’s assembly process to be more complex than expected, leading to frustration during setup.
While there are some negative aspects mentioned in user reviews, it’s important to note that these issues represent a minority of experiences. Most users provided positive feedback regarding the Cannondale Adventure Neo Allroad Speed Electric Bike.
The overall consensus from user reviews is that the majority of riders are satisfied with the Cannondale Adventure Neo Allroad Speed Electric Bike. Positive feedback highlights its impressive range, comfort, performance, durability, and thoughtful features, while negative feedback represents a minority of experiences with concerns mainly related to weight, price, minor technical issues, noise levels, and assembly complexity.
Cannondale Adventure Neo Allroad Speed Electric Bike Manual
The operating instructions and user manual for the Cannondale Adventure Neo Allroad Speed Electric Bike can be found on the manufacturer’s official website. To access detailed information on how to operate and maintain your electric bike, please visit the Cannondale website and navigate to the product support or downloads section.
Cannondale Adventure Neo Allroad Speed Electric Bike Frequently Asked Questions
1. How do I charge the battery of the Cannondale Adventure Neo Allroad Speed Electric Bike?
To charge the battery, locate the charging port on your bike, usually located near the bottom bracket or on the frame. Connect the charger provided with your bike to the charging port and plug it into a standard electrical outlet. Follow the charging instructions provided in the user manual for the recommended charging time and precautions.
2. What is the range of the Cannondale Adventure Neo Allroad Speed Electric Bike?
The range of the Cannondale Adventure Neo Allroad Speed Electric Bike can vary depending on several factors, including the rider’s weight, terrain, assist level, and weather conditions. However, under optimal conditions, it can achieve an impressive range of up to 71 miles on a single charge. Keep in mind that real-world range may vary.
3. How do I perform routine maintenance on the bike?
Routine maintenance includes tasks such as checking tire pressure, cleaning and lubricating the chain, inspecting brake pads, and ensuring all bolts and components are properly tightened. Refer to the user manual for specific maintenance intervals and detailed instructions on how to perform these tasks. Regular maintenance will help keep your bike in optimal condition.
4. What should I do if I encounter technical issues with my bike?
If you encounter technical issues with your Cannondale Adventure Neo Allroad Speed Electric Bike, refer to the troubleshooting section in the user manual. It provides step-by-step guidance on identifying and addressing common problems. If you are unable to resolve the issue, consider contacting the manufacturer’s customer service or visiting an authorized service center for professional assistance.
5. Can I ride the Cannondale Adventure Neo Allroad Speed Electric Bike in the rain?
The Cannondale Adventure Neo Allroad Speed Electric Bike is designed to withstand various weather conditions, including light rain and wet terrain. However, it is essential to exercise caution when riding in rainy conditions to prevent slipping and maintain control. Avoid submerging the bike in water, and always dry and store it properly after riding in wet conditions.
6. How do I adjust the pedal assist levels on the bike?
The Cannondale Adventure Neo Allroad Speed Electric Bike typically features a control panel or display that allows you to adjust pedal assist levels. Consult your user manual for specific instructions on using the control panel to select different assist levels. This feature allows you to tailor your riding experience to your desired level of assistance.
Conclusion
Whenever you encounter a problem with your Cannondale Adventure Neo Allroad Speed Electric Bike, it’s advisable to refer to the user manual for guidance on troubleshooting and maintenance. Additionally, if the issue persists or requires professional attention, don’t hesitate to reach out to the manufacturer’s customer service or visit an authorized service center. They can provide expert assistance to ensure your electric bike remains in optimal working condition.
Cannondale Treadwell Neo 2 EQ Remixte Common Problems
Cannondale Treadwell Neo 2 EQ Common Problems
Cannondale Treadwell Neo Common Problems