Cannondale Tesoro Neo X 3 Common Problems and Troubleshooting
If you own a Cannondale Tesoro Neo X 3 electric bike, you’re likely enjoying the thrill of on-road and off-road adventures. However, like any sophisticated machine, it may encounter common problems from time to time. In this article, we’ll explore these issues and provide troubleshooting tips to keep your Tesoro Neo X 3 running smoothly.
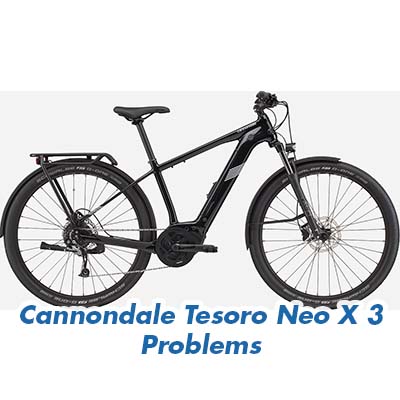
Cannondale Tesoro Neo X 3 Overview
The Cannondale Tesoro Neo X 3 is a fully loaded trekking electric bike designed to thrive on gravel roads and open terrains. Built for speed, efficiency, and comfort, this bike features a light and durable SmartForm C2 Alloy frame with a 100mm travel fork, a microSHIFT Marvo 9-speed drivetrain, and Shimano hydraulic disc brakes. The heart of this electric bike is the Bosch Performance Line Sport 250W drive unit paired with a 500Wh battery, providing a range of up to 85 miles (136km).
Product Details and Features
| Platform | Tesoro Neo X |
|---|---|
| Model Name | Tesoro Neo X 3 |
Causes of Common Problems with the Cannondale Tesoro Neo X 3
In the following subsections of the article, we will address possible problems and solutions specific to the Cannondale Tesoro Neo X 3 electric bike. Whether you’re an off-road enthusiast or prefer urban cycling, we’ve got you covered with troubleshooting tips to keep your ride enjoyable and hassle-free.
Common Problems with the Cannondale Tesoro Neo X 3
1. Battery Draining Quickly
Description: One common issue with the Cannondale Tesoro Neo X 3 is that the battery tends to drain quickly, leading to reduced riding range.
Cause: This problem may occur due to several factors, including high power mode usage, hilly terrains, or an aged battery.
Troubleshooting: To address this issue, follow these steps:
- Reduce the use of high power modes and ride in eco mode whenever possible.
- Avoid steep uphill climbs, which can consume more battery power.
- If your battery is old and loses capacity, consider replacing it to restore range.
2. Motor Not Functioning
Description: Some riders may encounter a problem where the electric motor on the Tesoro Neo X 3 does not function as expected.
Cause: Motor issues can stem from electrical connectivity problems, sensor malfunctions, or controller issues.
Troubleshooting: If you face motor problems, take the following steps:
- Check all electrical connections and ensure they are securely plugged in.
- Inspect the motor sensors for dirt or damage, clean if necessary.
- If the motor still does not function, consult a professional technician for diagnosis and repair.
3. Brake Noise and Squeaking
Description: Some riders may notice annoying noises such as squeaking when applying the brakes on the Cannondale Tesoro Neo X 3.
Cause: Brake noise often results from dirty or worn brake pads or rotor contamination.
Troubleshooting: To address brake noise issues, follow these steps:
- Inspect brake pads for wear and replace them if they are thin or worn out.
- Clean the brake rotor with a rotor-specific cleaner to remove contaminants.
- If the problem persists, consider adjusting the brake caliper alignment or consult a bike mechanic.
4. Gears Not Shifting Smoothly
Description: Riders may experience difficulty in shifting gears smoothly on the Tesoro Neo X 3 electric bike.
Cause: Gear shifting problems can result from cable tension issues, misalignment, or worn-out components.
Troubleshooting: To improve gear shifting, try the following steps:
- Check cable tension and adjust it if necessary to ensure proper shifting.
- Inspect the derailleur and hanger for damage or misalignment and make adjustments accordingly.
- If gear shifting problems persist, consider replacing worn-out components like the chain or cassette.
5. Uneven Tire Pressure
Description: Uneven tire pressure can lead to an imbalanced and uncomfortable ride on the Cannondale Tesoro Neo X 3.
Cause: This issue usually occurs due to improper inflation, punctures, or slow leaks in the tires.
Troubleshooting: To address uneven tire pressure problems, follow these steps:
- Regularly check and maintain proper tire pressure as per the manufacturer’s recommendations.
- Inspect the tires for punctures, cuts, or slow leaks and repair or replace them as needed.
- Balance the tire pressure between the front and rear tires for a smoother ride.
6. Chain Slippage
Description: Chain slippage occurs when the bike’s chain unexpectedly shifts between gears or falls off the chainring.
Cause: Chain slippage can result from a loose chain, worn-out chainring or cassette, or improper shifting technique.
Troubleshooting: To address chain slippage issues, follow these steps:
- Ensure the chain tension is appropriate by adjusting the rear derailleur if necessary.
- Inspect the chainring and cassette for wear and replace them if teeth are excessively worn.
- Practice smooth and deliberate gear shifting to minimize the risk of chain slippage.
7. Rattling or Loose Accessories
Description: Riders may experience rattling noises or notice that accessories like fenders or racks are coming loose during rides.
Cause: This problem can be attributed to vibrations from rough terrain or inadequate attachment of accessories.
Troubleshooting: To address rattling or loose accessory issues, follow these steps:
- Regularly check and tighten all accessory bolts and attachments before each ride.
- Consider using thread locker on accessory bolts to prevent them from loosening due to vibrations.
- Opt for high-quality, vibration-resistant accessories for a more secure fit.
8. Inconsistent Pedal Assistance
Description: Some riders may notice that the pedal assistance from the electric motor feels inconsistent or intermittent.
Cause: Inconsistent pedal assistance can be caused by sensor issues, wiring problems, or battery-related fluctuations.
Troubleshooting: To address inconsistent pedal assistance, follow these steps:
- Check for loose or damaged wiring connections related to the pedal-assist system.
- Inspect the sensors for dirt or misalignment and clean or adjust them as necessary.
- Ensure the battery is securely attached and charged to the appropriate level.
9. Excessive Noise from the Drive Unit
Description: Some riders may encounter excessive noise, such as grinding or whirring, emanating from the bike’s drive unit.
Cause: Drive unit noise can result from dirt or debris in the unit, loose components, or mechanical wear.
Troubleshooting: To address excessive drive unit noise, follow these steps:
- Inspect the drive unit for any visible debris or foreign objects and remove them carefully.
- Tighten any loose components or fasteners within the drive unit assembly.
- If noise persists, consult a professional technician for a more thorough inspection and potential maintenance.
10. Unresponsive Display
Description: Riders may encounter issues with the display not responding to input or failing to show crucial information.
Cause: An unresponsive display can be due to loose connections, display unit malfunctions, or battery-related problems.
Troubleshooting: To address an unresponsive display, follow these steps:
- Check and secure all wiring connections related to the display unit.
- If possible, reset the display unit to its default settings as per the manufacturer’s instructions.
- Ensure the battery is adequately charged and that there are no issues with its connection to the display unit.
11. Excessive Vibration While Riding
Description: Riders may experience an uncomfortable level of vibration through the handlebars and frame during rides.
Cause: Excessive vibration can occur due to unbalanced wheels, loose components, or improper tire pressure.
Troubleshooting: To address excessive vibration issues, follow these steps:
- Check and balance the wheels to ensure they are evenly weighted.
- Inspect and tighten all frame and handlebar components for secure attachment.
- Maintain proper tire pressure to minimize vibrations from the road surface.
12. Unpredictable Power Cuts
Description: Some riders may encounter unpredictable power cuts, where the electric assistance suddenly stops.
Cause: Power cuts can result from loose or damaged wiring, overheating, or sensor malfunctions.
Troubleshooting: To address unpredictable power cuts, follow these steps:
- Inspect all electrical connections, especially those related to the battery and motor, and secure them properly.
- Ensure the electric components are not overheating during extended rides.
- Clean and check the sensors for proper functioning and alignment.
13. Brakes Feeling Soft or Ineffective
Description: Some riders may notice that the brakes feel soft or less responsive, affecting stopping power.
Cause: Soft brakes can be caused by air in the brake lines, worn brake pads, or improper adjustment.
Troubleshooting: To address soft brake issues, follow these steps:
- Bleed the brake lines to remove any trapped air, restoring proper brake pressure.
- Inspect and replace worn brake pads if they are below the recommended thickness.
- Adjust the brake calipers and levers to ensure proper alignment and tension.
14. Pedal Assist Error Codes
Description: Riders may encounter error codes on the display related to the pedal-assist system.
Cause: Error codes can indicate sensor faults, wiring issues, or communication problems within the pedal-assist system.
Troubleshooting: To address pedal assist error codes, follow these steps:
- Refer to the bike’s user manual or documentation to identify the specific error code and its meaning.
- Inspect sensor connections and wiring for any visible damage or loose connections.
- If the issue persists, contact customer support or a technician with experience in electric bike systems.
15. Wobbly or Misaligned Wheels
Description: Riders may notice that their wheels are wobbly or not properly aligned, affecting ride stability.
Cause: Wheel issues can arise from loose spokes, bent rims, or improper wheel truing.
Troubleshooting: To address wobbly or misaligned wheel issues, follow these steps:
- Tighten loose spokes to ensure proper tension and wheel stability.
- Inspect the rims for signs of damage and replace if necessary.
- If you are not experienced in wheel truing, consult a professional bike mechanic for alignment and truing services.
16. Excessive Chain Noise
Description: Riders may notice an unusual amount of noise coming from the bike’s chain while pedaling.
Cause: Excessive chain noise can result from a dirty or dry chain, misalignment, or worn drivetrain components.
Troubleshooting: To address excessive chain noise, follow these steps:
- Clean and lubricate the chain with a suitable bicycle chain lubricant to reduce friction and noise.
- Check for chain and cassette wear and replace them if necessary.
- Inspect chainring alignment and derailleur adjustment for proper positioning.
17. Display Screen Malfunctions
Description: Riders may encounter issues with the bike’s display screen, such as flickering, freezing, or malfunctioning buttons.
Cause: Display screen malfunctions can occur due to electrical problems, software glitches, or physical damage.
Troubleshooting: To address display screen malfunctions, follow these steps:
- Ensure that all display screen cables and connections are securely plugged in.
- Check for available firmware updates and apply them if needed to resolve software issues.
- If physical damage is suspected, contact a professional technician for repair or replacement.
18. Tire Punctures and Flats
Description: Riders may experience frequent tire punctures or flats, disrupting their rides.
Cause: Tire punctures can result from sharp objects on the road, inadequate tire protection, or worn-out tires.
Troubleshooting: To address tire punctures and flats, follow these steps:
- Inspect tires for debris or sharp objects and remove them to prevent further punctures.
- Consider using puncture-resistant tire liners or tubeless tire setups to minimize flat tire occurrences.
- Replace tires that have worn down beyond the recommended tread depth to maintain better puncture resistance.
19. Loose Handlebars or Stem
Description: Riders may notice that the handlebars or stem become loose during rides, affecting control and safety.
Cause: Loose handlebars or stem can occur due to improper assembly, vibration, or inadequate tightening.
Troubleshooting: To address loose handlebars or stem, follow these steps:
- Regularly check and tighten the handlebar and stem bolts to the manufacturer’s recommended torque settings.
- Consider using carbon assembly paste to enhance grip and prevent slippage between components.
- Inspect for any signs of damage or wear in the handlebar and stem components, replacing them if necessary.
20. Charging and Battery Issues
Description: Riders may encounter difficulties related to charging the battery, including slow charging, failure to hold a charge, or erratic battery behavior.
Cause: Charging and battery issues can stem from damaged charging ports, battery deterioration, or electrical faults.
Troubleshooting: To address charging and battery issues, follow these steps:
- Inspect the charging port for dirt or damage and clean it if necessary.
- If the battery no longer holds a charge effectively, consider replacing it with a compatible unit.
- If problems persist, consult a professional technician with experience in electric bike battery systems.
21. Unstable Suspension
Description: Some riders may experience an unstable or sagging suspension, affecting ride comfort and control.
Cause: Suspension issues can result from improper setup, lack of maintenance, or worn-out suspension components.
Troubleshooting: To address unstable suspension, follow these steps:
- Inspect and adjust the suspension settings according to your weight and riding style.
- Maintain regular suspension maintenance, including cleaning and lubricating suspension seals and pivots.
- If the suspension still feels unstable, consider replacing worn-out suspension components as needed.
22. Motor Overheating
Description: Riders may encounter issues with the motor overheating, leading to reduced performance or safety concerns.
Cause: Motor overheating can occur due to excessive load, extended high-power usage, or poor airflow around the motor.
Troubleshooting: To address motor overheating, follow these steps:
- Avoid overloading the bike with excessive cargo weight, as it can strain the motor.
- Use high-power modes sparingly to prevent the motor from overheating during prolonged rides.
- Ensure the motor has proper airflow and cooling, keeping it free from obstructions.
23. Inaccurate Battery Range Estimations
Description: Riders may find that the displayed battery range estimations do not align with their actual riding experience.
Cause: Inaccurate battery range estimations can be due to various factors, including terrain changes and battery wear.
Troubleshooting: To address inaccurate battery range estimations, follow these steps:
- Understand that range estimates can fluctuate based on factors such as terrain, rider weight, and assist mode.
- Calibrate the bike’s computer system according to your riding conditions to improve accuracy.
- If the battery is aged and no longer provides accurate range estimates, consider replacing it.
24. Pedals Coming Loose
Description: Riders may encounter issues with the pedals becoming loose during rides, affecting pedaling efficiency and safety.
Cause: Loose pedals can occur due to insufficient tightening, damaged threads, or worn pedal components.
Troubleshooting: To address loose pedal issues, follow these steps:
- Regularly check and ensure that the pedals are securely tightened to the recommended torque settings.
- Inspect pedal threads for damage, and replace pedals or pedals parts if necessary.
- Consider using thread locker or anti-seize compound when installing pedals to prevent them from coming loose.
25. Sudden Loss of Electric Assistance
Description: Riders may experience a sudden and unexpected loss of electric assistance while riding, leading to a significant decrease in speed.
Cause: Sudden loss of electric assistance can be attributed to electrical issues, battery disconnection, or sensor malfunctions.
Troubleshooting: To address sudden loss of electric assistance, follow these steps:
- Check all electrical connections and ensure they are securely plugged in.
- Inspect the battery’s connection to the bike’s electrical system and reattach it if disconnected.
- If the issue persists, inspect sensors and wiring for damage or misalignment and make necessary repairs or adjustments.
Cannondale Tesoro Neo X 3 Electric Bike User Reviews
If you’re considering the Cannondale Tesoro Neo X 3 Electric Bike, it’s essential to gather insights from real users who have experienced this bike firsthand. We’ve compiled a summary of user reviews available on the internet to provide you with a comprehensive overview of the experiences shared by Cannondale Tesoro Neo X 3 riders.
Positive Reviews from Cannondale Tesoro Neo X 3 Electric Bike Users
While reviewing user feedback for the Cannondale Tesoro Neo X 3 Electric Bike, we found several positive aspects of this electric bike that customers appreciated. Here’s a summary of the positive experiences shared by users:
- Some users were satisfied with the exceptional range provided by the bike’s 500Wh battery, allowing them to enjoy long rides without worrying about frequent recharging.
- Many riders praised the bike’s versatility, mentioning its ability to handle both on-road and off-road terrains with ease.
- Several users found the Bosch Performance Line Sport 250W drive unit to be powerful and reliable, offering them the speed and assistance they desired.
- Customers appreciated the durability of the SmartForm C2 Alloy frame, which was noted for its robust build and ability to withstand challenging riding conditions.
- Overall, positive feedback indicated that the Cannondale Tesoro Neo X 3 provided a comfortable and confident riding experience, whether on gravel roads or city streets.
Negative User Reviews of the Cannondale Tesoro Neo X 3 Electric Bike
It’s also important to consider the drawbacks mentioned by some users of the Cannondale Tesoro Neo X 3 Electric Bike. Here’s a summary of the common issues reported by riders:
- Some users were not satisfied with the bike’s weight, mentioning that it felt heavier than expected, particularly when riding without electric assistance.
- A few riders reported issues with the bike’s pedal assist system, including sporadic cut-offs and inconsistent power delivery.
- Several users expressed concerns about the bike’s price, stating that it might be on the higher end of the electric bike market.
- While the bike’s versatility was appreciated by many, some riders noted that it might not excel in extreme off-road conditions, making it more suitable for light to moderate off-roading.
- Minor complaints were also made about specific components, such as the saddle and grips, with a few users opting to customize these for added comfort.
In conclusion, the majority of users who shared their experiences with the Cannondale Tesoro Neo X 3 Electric Bike seemed satisfied with its performance, range, and versatility. However, it’s crucial to consider both positive and negative feedback to make an informed decision based on your specific riding needs and preferences.
Cannondale Tesoro Neo X 3 Electric Bike Manual
For detailed operating instructions and guidance on the Cannondale Tesoro Neo X 3 Electric Bike, you can find the official manual on the manufacturer’s website. The manual provides essential information on assembly, maintenance, and safe operation of your electric bike. It’s a valuable resource to ensure you get the most out of your Cannondale Tesoro Neo X 3.
Frequently Asked Questions
1. How far can I ride on a single charge with the Cannondale Tesoro Neo X 3?
The range of the Cannondale Tesoro Neo X 3 can vary depending on several factors, including rider weight, terrain, assist level, and battery condition. However, you can typically expect a range of up to 85 miles (136 kilometers) on a fully charged 500Wh battery in optimal conditions.
2. What should I do if I experience a sudden loss of electric assistance while riding?
If you encounter a sudden loss of electric assistance, first check the battery connection to ensure it’s securely attached. If the issue persists, inspect the sensors and wiring for damage or misalignment. It’s recommended to consult the bike’s manual for troubleshooting steps and contact customer service or a service center if needed.
3. Can I use the Cannondale Tesoro Neo X 3 for off-road adventures?
Yes, the Cannondale Tesoro Neo X 3 is designed to handle a variety of terrains, including off-road trails and gravel roads. Its MTB-inspired frame and fork, along with 29-inch wheels, make it suitable for bikepacking and backroad trekking, providing a versatile riding experience.
4. Are there any specific maintenance tasks I should perform regularly?
Regular maintenance is essential to keep your Cannondale Tesoro Neo X 3 in optimal condition. Tasks include checking and lubricating the chain, inspecting tire pressure, and ensuring all bolts and connections are properly tightened. Consult the bike’s manual for a comprehensive maintenance schedule.
5. How can I maximize the lifespan of the battery on my Cannondale Tesoro Neo X 3?
To extend the battery’s lifespan, avoid overcharging or deep discharging it regularly. Store the bike in a cool, dry place, and charge the battery when it’s not in use to maintain an optimal charge level. Additionally, follow the manufacturer’s recommendations for battery care and storage.
Conclusion
In conclusion, if you encounter any problems with your Cannondale Tesoro Neo X 3 Electric Bike, it’s advisable to refer to the manual for guidance on troubleshooting and maintenance. For more complex issues, don’t hesitate to contact customer service or a certified service center to ensure your bike remains in top condition and delivers the best riding experience.
Cannondale Adventure Neo 2 EQ Common Problems
Cannondale Topstone Neo SL 2 Common Problems
Cannondale Tesoro Neo X Speed Common Problems