Corratec Life CX7 ABS Common Problems and Troubleshooting
Welcome to our guide on common problems and troubleshooting for the Corratec Life CX7 ABS Electric Bike. In this article, we will address potential issues that you might encounter while using this specific model of electric bike. Whether you’re a new owner or a long-time rider, this information will help you keep your Corratec CX7 ABS running smoothly.
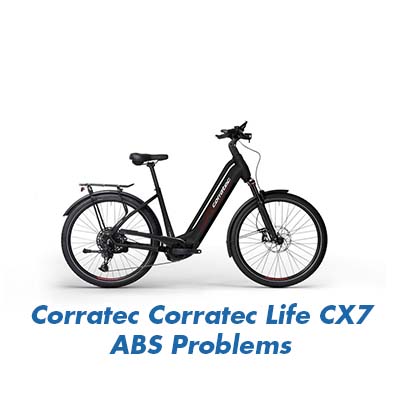
Corratec Life CX7 ABS Overview
The Corratec Life CX7 ABS is a high-performance electric bike designed for both on-road and off-road adventures. Here’s a brief overview of its key features:
| Outstanding Features | Frame | Fork | Brakes | Stem | Handlebar | Saddle | Seat post | Chainwheel | Rear derailleur | Shift levers | Rim | Tire | Engine | Battery | Accessories |
|---|---|---|---|---|---|---|---|---|---|---|---|---|---|---|---|
| Permissible system weight up to 180 Kg Shadow Edge Tube 3.0 for an elegant integration of the 750 Wh Bosch battery The E-Bike SUV – Amazing performance both on and off the road. | Corratec Life + | SR Suntour MOBIE342 CR DS ABS + | Magura MT C ABS Allroad front Size brake disc: 203 mm Magura MT C ABS Allroad rear Size brake disc: 180 mm | Corratec ICR System + | ZZYZX Corratec Life Handlebar + | SQ Lab 621 Active + | ZZYZX SL Alloy Seatpost + Outer diameter: 30.9 mm | ZZYZX E-Power Crank + Number of chainrings: 1s; Ratio: 38 | Enviolo CT Manual Controller + | Enviolo TR + | ZZYZX Life front Rim outer diameter: 27.50 zoll ZZYZX Life rear Rim outer diameter: 27.50 zoll | Schwalbe Johnny Watts 29″ front Inside diameter: 27.50 zoll Schwalbe Johnny Watts 29″ rear Inside diameter: 27.50 zoll | BOSCH Performance Line CX + Max speed: 25 km/h Power: 250 watt Torque: 85 Nm (J) | BOSCH PowerTube 750Wh + Energy: 750 wh | Bosch Kiox 300 Display |
Causes of Common Problems with the Corratec Life CX7 ABS
This introductory snippet will provide an overview of potential issues and their solutions that will be discussed in the following subsections of the article.
Common Problems with the Corratec Life CX7 ABS
1. Battery Drains Quickly
Description: One common issue with the Corratec Life CX7 ABS is that the battery tends to drain quickly, reducing the bike’s overall range.
Cause: This problem can occur due to a combination of factors, including excessive power usage, terrain, and battery age.
Troubleshooting: To address this issue, follow these steps:
- Check your riding mode: Switch to a lower power-assist mode if you’re not riding in a challenging terrain.
- Maintain proper tire pressure: Underinflated tires can increase resistance and reduce efficiency.
- Charge the battery correctly: Follow the manufacturer’s guidelines for charging cycles and avoid overcharging.
- Consider a battery replacement: If your battery is old and has significantly reduced capacity, consider replacing it.
2. Motor Malfunction
Description: Some users may experience motor malfunctions, where the electric motor fails to provide assistance or makes unusual noises.
Cause: Motor issues can be caused by wiring problems, overheating, or sensor failures.
Troubleshooting: If you encounter motor problems, take these steps:
- Check the wiring: Inspect the wiring connections for any loose or damaged wires and reconnect them securely.
- Cool down the motor: Allow the motor to cool down if it has been used extensively, and avoid pushing the bike beyond its limits.
- Calibrate sensors: Follow the user manual to calibrate sensors or reset the motor system if necessary.
- Contact customer support: If issues persist, contact Corratec’s customer support for professional assistance.
3. Inaccurate Display Readings
Description: Some riders may notice that the bike’s display shows inaccurate information, such as speed or remaining battery life.
Cause: Display inaccuracies can result from sensor misalignment, software glitches, or damaged components.
Troubleshooting: To address display issues, follow these steps:
- Check sensor alignment: Ensure that all sensors, such as the wheel speed sensor, are properly aligned and free from debris.
- Update firmware: If applicable, update the bike’s firmware to the latest version to resolve software-related issues.
- Inspect display connections: Examine the display unit’s connections and clean any corroded contacts.
- Replace the display: If problems persist, consider replacing the display unit with a new one.
4. Brake Performance Issues
Description: Some users may encounter problems with the bike’s brakes, such as reduced braking effectiveness or squeaking noises.
Cause: Brake issues can be caused by worn brake pads, contaminated brake discs, or improper brake adjustment.
Troubleshooting: If you experience brake performance problems, follow these steps:
- Inspect brake pads: Check the condition of your brake pads and replace them if they are worn down.
- Clean brake discs: Remove any contaminants from the brake discs using appropriate cleaning solutions.
- Adjust brake tension: Adjust the brake tension to ensure the brakes engage smoothly without excessive force.
- Visit a bike shop: If problems persist, visit a bike shop for professional brake system inspection and maintenance.
5. Gears Shifting Erratically
Description: Riders may encounter issues with the gears shifting erratically or not smoothly, affecting the bike’s overall performance.
Cause: Gear shifting problems can be due to cable tension issues, misalignment, or worn components.
Troubleshooting: To address gear shifting problems, follow these steps:
- Check cable tension: Ensure that the gear cables are properly tensioned and not excessively loose or tight.
- Inspect derailleur alignment: Make sure the front and rear derailleurs are properly aligned with the gears.
- Replace worn components: If gear teeth or chainrings are worn, consider replacing them to improve shifting.
- Seek professional assistance: If problems persist, visit a bike shop for precise gear adjustment and maintenance.
6. Chain Slippage
Description: Chain slippage occurs when the bike’s chain unexpectedly jumps off the chainrings or cassette, causing disruptions in pedaling.
Cause: Chain slippage can be caused by a loose chain, worn drivetrain components, or misadjusted derailleurs.
Troubleshooting: To address chain slippage, follow these steps:
- Inspect chain tension: Ensure the chain is properly tensioned, and adjust if necessary.
- Check for wear: Examine the chain, chainrings, and cassette for signs of wear and replace worn parts.
- Derailleur adjustment: Properly align and adjust the front and rear derailleurs to prevent chain misalignment.
- Lubricate the chain: Apply chain lubricant to reduce friction and improve chain performance.
7. Noisy Suspension
Description: Some riders may experience noisy suspension components, such as squeaks or creaks, during rides.
Cause: Suspension noise can result from dry bushings, loose bolts, or worn-out suspension seals.
Troubleshooting: To address noisy suspension, follow these steps:
- Lubricate bushings: Apply suspension-specific lubricant to bushings and pivot points to reduce friction.
- Tighten bolts: Check and tighten all suspension-related bolts to ensure they are secure.
- Inspect seals: Examine suspension seals for damage or wear and replace as needed.
- Consider professional service: If noise persists, consider professional suspension service for a thorough inspection.
8. Unresponsive Display
Description: Some users may encounter issues where the bike’s display becomes unresponsive or fails to turn on.
Cause: Display problems can stem from battery issues, loose connections, or faulty display units.
Troubleshooting: If you face display unresponsiveness, follow these steps:
- Check battery status: Ensure the bike’s battery is charged and properly connected.
- Inspect connections: Examine all display unit connections and ensure they are securely attached.
- Perform a reset: If possible, perform a factory reset on the display unit as a troubleshooting step.
- Contact customer support: If the display remains unresponsive, reach out to Corratec’s customer support for guidance.
9. Frequent Chain Drop
Description: Riders may experience frequent chain drops, where the chain falls off the chainrings, leading to disruptions in riding.
Cause: Frequent chain drops can be caused by a misaligned front derailleur, chainring wear, or chain tension issues.
Troubleshooting: To address chain drop issues, follow these steps:
- Front derailleur adjustment: Properly align and adjust the front derailleur to prevent chain misalignment.
- Inspect chainring teeth: Check the condition of the chainring teeth for wear and replace if necessary.
- Chain tension: Ensure proper chain tension to prevent excessive slack that can lead to chain drops.
- Consider a chain guide: If problems persist, consider installing a chain guide to prevent chain drops.
10. Unusual Noises from the Motor
Description: Some riders may notice unusual noises coming from the electric motor, which can be concerning.
Cause: Unusual motor noises can be attributed to loose components, damaged bearings, or motor malfunctions.
Troubleshooting: If you hear unusual motor noises, follow these steps:
- Check for loose parts: Inspect the motor and surrounding components for loose bolts or fittings and tighten them.
- Examine bearings: Examine motor bearings for damage or wear and replace them if necessary.
- Motor system reset: If supported, perform a motor system reset following the manufacturer’s instructions.
- Seek professional assistance: If the noise persists or is accompanied by decreased performance, contact a professional technician.
11. Erratic Pedal Assist
Description: Some users may experience erratic behavior with the pedal-assist system, including sudden surges or drops in power assistance.
Cause: This problem can occur due to sensor issues, software glitches, or wiring problems in the pedal-assist system.
Troubleshooting: To address erratic pedal assist, follow these steps:
- Check sensor alignment: Ensure that the pedal-assist sensors are properly aligned and free from debris.
- Update firmware: If available, update the bike’s pedal-assist system firmware to the latest version.
- Inspect wiring: Examine the wiring connections related to the pedal-assist system for loose or damaged wires.
- Reset the system: Perform a system reset or calibration following the manufacturer’s instructions.
12. Uncomfortable Saddle
Description: Riders may find the bike’s saddle uncomfortable, leading to discomfort during longer rides.
Cause: Saddle discomfort can be caused by poor fit, improper saddle adjustment, or personal preferences.
Troubleshooting: To address saddle discomfort, follow these steps:
- Adjust saddle position: Experiment with saddle height, angle, and fore-aft position to find a comfortable fit.
- Try a different saddle: Consider replacing the stock saddle with one that better suits your anatomy and riding style.
- Use padded shorts: Wear padded cycling shorts to provide additional comfort during rides.
- Get a professional fitting: Consider a professional bike fitting to optimize saddle comfort.
13. Uneven Tire Wear
Description: Uneven tire wear can lead to reduced tire lifespan and compromised traction on the road.
Cause: Tire wear discrepancies can result from improper tire pressure, misalignment, or road conditions.
Troubleshooting: To address uneven tire wear, follow these steps:
- Maintain proper tire pressure: Check and maintain the recommended tire pressure to ensure even wear.
- Inspect wheel alignment: Ensure that the wheels are properly aligned to prevent uneven tire wear.
- Rotate tires: Periodically switch the front and rear tires to distribute wear more evenly.
- Avoid rough terrain: Be cautious on rough or gravel roads to minimize tire wear.
14. Charging Issues
Description: Some users may encounter difficulties when trying to charge the bike’s battery.
Cause: Charging problems can arise from faulty chargers, damaged charging ports, or battery-related issues.
Troubleshooting: To address charging issues, follow these steps:
- Check the charger: Ensure that the charger is functioning correctly and the LED indicator shows the charging process.
- Inspect the charging port: Examine the charging port on the bike for debris or damage and clean it if necessary.
- Try a different outlet: Plug the charger into a different power outlet to rule out electrical issues.
- Battery check: If problems persist, have the battery checked by a professional technician.
15. Loose Handlebar Grips
Description: Loose handlebar grips can lead to discomfort and reduced control while riding.
Cause: Handlebar grip issues can result from improper installation, wear, or a lack of adhesive.
Troubleshooting: To address loose handlebar grips, follow these steps:
- Reposition grips: Carefully reposition the grips on the handlebars, ensuring they are evenly spaced and secure.
- Use grip adhesive: Apply grip adhesive or grip tape to enhance grip security.
- Replace worn grips: If the grips are excessively worn, consider replacing them with new ones.
- Check handlebar ends: Ensure that the handlebar ends are securely plugged to prevent grip slippage.
16. Excessive Chain Noise
Description: Some riders may experience excessive noise coming from the bike’s chain, affecting the overall riding experience.
Cause: Excessive chain noise can result from a lack of lubrication, misaligned chain, or worn chainrings.
Troubleshooting: To address excessive chain noise, follow these steps:
- Lubricate the chain: Apply chain lubricant regularly to reduce friction and noise.
- Check chain alignment: Ensure that the chain runs smoothly on the chainrings and cogs without misalignment.
- Inspect chainring condition: Examine the chainring teeth for signs of wear and replace if necessary.
- Professional assessment: If noise persists, have the drivetrain inspected by a professional mechanic.
17. Loose or Unstable Stem
Description: A loose or unstable stem can lead to steering difficulties and reduced control while riding.
Cause: Stem issues can arise from improper assembly, loose bolts, or stem wear.
Troubleshooting: To address a loose or unstable stem, follow these steps:
- Tighten stem bolts: Check and tighten the stem bolts to the manufacturer’s recommended torque specifications.
- Inspect headset bearings: Examine the headset bearings for wear and replace if needed.
- Proper assembly: Ensure the stem is correctly aligned with the front wheel and fork and is securely attached.
- Professional evaluation: If problems persist, seek assistance from a bike mechanic for stem adjustment.
18. Reduced Brake Responsiveness
Description: Reduced brake responsiveness can compromise rider safety and control.
Cause: Brake issues can stem from brake pad contamination, worn components, or improper brake adjustment.
Troubleshooting: To address reduced brake responsiveness, follow these steps:
- Replace brake pads: If the brake pads are worn or contaminated, replace them with new ones.
- Clean brake discs: Remove contaminants from the brake discs using appropriate cleaning solutions.
- Brake adjustment: Adjust the brake tension to ensure the brakes engage smoothly and promptly.
- Check hydraulic brakes: If equipped, inspect hydraulic brake lines for leaks or air bubbles and bleed the system if necessary.
19. Unpredictable Battery Range
Description: Riders may notice that the bike’s battery range varies unpredictably, affecting trip planning.
Cause: Inconsistent battery range can result from terrain changes, weather conditions, and battery health.
Troubleshooting: To address unpredictable battery range, follow these steps:
- Monitor terrain: Be aware of the terrain you’ll be riding on and adjust your riding mode accordingly.
- Consider weather conditions: Extreme temperatures can affect battery performance, so plan your rides accordingly.
- Maintain battery health: Follow the manufacturer’s guidelines for battery maintenance and storage.
- Calibrate range estimation: Some e-bikes allow you to recalibrate the battery range estimation for more accuracy.
20. Handlebar Vibration
Description: Riders may experience excessive handlebar vibration, leading to discomfort and reduced control.
Cause: Handlebar vibration can be caused by unbalanced wheels, worn tires, or improper tire pressure.
Troubleshooting: To address handlebar vibration, follow these steps:
- Balance the wheels: Ensure that the wheels are properly balanced to reduce vibrations.
- Check tire condition: Examine the tires for signs of wear or damage and replace them if necessary.
- Adjust tire pressure: Maintain the recommended tire pressure to minimize vibrations.
- Inspect handlebar and stem: Ensure that the handlebar and stem are securely attached and properly aligned.
21. Unresponsive Pedal Assist Modes
Description: Riders may encounter issues with unresponsive pedal assist modes, making it challenging to adjust power levels.
Cause: Unresponsive assist modes can result from software glitches, sensor malfunctions, or electrical problems.
Troubleshooting: To address unresponsive pedal assist modes, follow these steps:
- Power cycle the bike: Turn the bike off and on again to reset the assist modes.
- Update firmware: If available, update the bike’s firmware to the latest version to resolve software-related issues.
- Check sensor connections: Inspect the connections of pedal-assist sensors and ensure they are securely attached.
- Consult manufacturer support: If problems persist, contact Corratec’s customer support for assistance.
22. Difficult Gear Shifting
Description: Riders may find it challenging to shift gears smoothly, leading to disruptions in the riding experience.
Cause: Difficult gear shifting can be caused by cable tension issues, misaligned derailleurs, or worn shift components.
Troubleshooting: To address difficult gear shifting, follow these steps:
- Adjust cable tension: Ensure that the gear cables have the proper tension for smooth shifting.
- Derailleur alignment: Align and adjust the front and rear derailleurs to prevent misalignment.
- Lubricate shift components: Apply lubricant to shift cables and pivot points for improved shifting performance.
- Inspect chain and cassette: Examine the chain and cassette for wear and replace them if necessary.
23. Frequent Tire Punctures
Description: Riders may experience frequent tire punctures, leading to inconvenience and disruptions during rides.
Cause: Frequent punctures can result from riding on rough terrain, inadequate tire pressure, or sharp debris on the road.
Troubleshooting: To address frequent tire punctures, follow these steps:
- Choose puncture-resistant tires: Consider upgrading to tires with added puncture protection features.
- Maintain proper tire pressure: Check and maintain the recommended tire pressure to reduce the risk of pinch flats.
- Avoid debris: Be cautious and steer clear of sharp debris or obstacles on the road.
- Carry repair tools: Carry essential tire repair tools like patches, tire levers, and a pump to address punctures on the go.
24. Inconsistent Motor Power
Description: Riders may notice inconsistencies in motor power output, affecting the bike’s performance.
Cause: Inconsistent motor power can result from overheating, sensor issues, or voltage fluctuations.
Troubleshooting: To address inconsistent motor power, follow these steps:
- Cool down the motor: Allow the motor to cool down if it has been used extensively, and avoid overheating.
- Check sensor connections: Inspect the connections of motor sensors and ensure they are securely attached.
- Battery voltage: Monitor the battery voltage and ensure it remains within the specified operating range.
- Professional diagnosis: If problems persist, seek professional assistance for motor system diagnostics.
25. Unwanted Motor Activation
Description: Some riders may experience unwanted motor activation, where the motor engages unexpectedly.
Cause: Unwanted motor activation can result from faulty wiring, sensor malfunctions, or interference with the motor system.
Troubleshooting: To address unwanted motor activation, follow these steps:
- Check wiring connections: Inspect all motor-related wiring connections for loose or damaged wires and reconnect them securely.
- Sensor calibration: Calibrate motor sensors following the manufacturer’s instructions to prevent false activations.
- Electromagnetic interference: Avoid areas with strong electromagnetic interference that can affect the motor system.
- Professional assessment: If issues persist, consult a professional technician for a thorough diagnosis.
Corratec Life CX7 ABS Electric Bike User Reviews
When considering a purchase like the Corratec Life CX7 ABS Electric Bike, it’s essential to take into account the experiences and feedback of actual users. Here, we provide an overview of user reviews gathered from various sources on the internet, focusing on both positive and negative aspects of this electric bike.
Positive Reviews from Corratec Life CX7 ABS Electric Bike Users
Some users were satisfied with the following parameters associated with their Corratec Life CX7 ABS Electric Bike:
- Impressive Battery Life: Several users praised the long-lasting battery of the CX7 ABS, allowing them to enjoy extended rides without worrying about frequent recharges.
- Powerful Motor: Many riders appreciated the bike’s powerful electric motor, which provided ample assistance, especially when tackling steep hills and challenging terrains.
- Comfortable Riding Experience: Users highlighted the comfortable saddle, well-designed frame, and responsive suspension, contributing to a smooth and enjoyable riding experience.
- Versatile Off-Road Performance: Some users commended the CX7 ABS for its capability to perform exceptionally well both on and off-road, making it a versatile choice for various cycling adventures.
- Quality Construction: Positive feedback was given for the bike’s overall build quality, indicating durability and reliability over time.
Based on these positive experiences, it is evident that the Corratec Life CX7 ABS Electric Bike has garnered appreciation for its battery performance, motor power, riding comfort, versatility, and construction quality.
Negative User Reviews of the Corratec Life CX7 ABS Electric Bike
Some users were not satisfied with the following problems associated with their Corratec Life CX7 ABS Electric Bike:
- Charging Inefficiency: Several riders expressed frustration with the bike’s charging process, citing longer-than-expected charging times and inconsistent charging performance.
- Motor Issues: Some users reported occasional motor malfunctions, including unexpected power surges or drops, which affected their riding experience.
- Weight Concerns: A few riders found the bike to be relatively heavy, making it less convenient to transport or maneuver, especially in non-electric mode.
- Braking Challenges: Negative feedback was given regarding brake responsiveness, with some users experiencing issues like squeaking or delayed braking action.
- Price Considerations: A minority of users mentioned that the bike’s price point was relatively high compared to similar electric bikes on the market.
While the majority of users had positive experiences with the Corratec Life CX7 ABS Electric Bike, it’s worth noting that there were some concerns related to charging, motor performance, weight, braking, and price.
The overall consensus from user reviews gathered from various sources on the internet suggests that the majority of users were satisfied with the Corratec Life CX7 ABS Electric Bike. Positive feedback centered around its impressive battery life, powerful motor, riding comfort, versatility, and build quality.
However, it’s important to be aware of the occasional challenges mentioned, such as charging efficiency, motor issues, and weight concerns, which may vary from user to user.
Corratec Life CX7 ABS Electric Bike Manual
You can find the comprehensive operating instructions and user manual for the Corratec Life CX7 ABS Electric Bike on the manufacturer’s official website. The manual provides essential information on assembly, operation, maintenance, and safety guidelines for your electric bike. We recommend referring to the official manual for a detailed guide on using and maintaining your CX7 ABS Electric Bike.
Corratec Life CX7 ABS Frequently Asked Questions
1. How do I charge the battery of my Corratec Life CX7 ABS Electric Bike?
To charge the battery, locate the charging port on your CX7 ABS Electric Bike. Plug the provided charger into the port, then connect the charger to a standard electrical outlet. Follow the manufacturer’s instructions regarding charging times and precautions.
2. Can I ride the CX7 ABS Electric Bike in rainy conditions?
Yes, the Corratec Life CX7 ABS is designed to be weather-resistant, allowing you to ride it in light rain or wet conditions. However, it’s advisable to avoid heavy downpours and to wipe down the bike after riding in wet conditions to prevent water damage.
3. What should I do if I experience a sudden loss of power while riding?
If you encounter a sudden loss of power, first, check the battery level to ensure it’s not depleted. If the battery level is sufficient, inspect the electrical connections, and make sure they are secure. If the issue persists, consult the user manual or contact customer service for further assistance.
4. How often should I perform maintenance on my CX7 ABS Electric Bike?
Regular maintenance is crucial for the optimal performance of your electric bike. It’s recommended to perform basic maintenance tasks, such as cleaning, lubricating the chain, and inspecting tire pressure, before each ride. Additionally, a more thorough maintenance check should be performed periodically, as specified in the user manual.
5. Can I use the CX7 ABS Electric Bike for off-road adventures?
Yes, the Corratec Life CX7 ABS is designed to handle off-road riding with its robust construction and capable motor. It’s suitable for various terrains, including trails and gravel paths, providing a versatile riding experience.
Conclusion
When encountering any issues or problems with your Corratec Life CX7 ABS Electric Bike, always refer to the user manual provided by the manufacturer for guidance on troubleshooting and maintenance. Additionally, don’t hesitate to reach out to the manufacturer’s customer service or a certified service center for professional assistance when necessary. Your safety and satisfaction are a top priority.
Corratec E-Power Sport 28 Gent Common Problems
Corratec E-Power MTC Elite 12 Gent Common Problems
Corratec E-Power Trekking 28 Gent Common Problems